A major responsibility of building owners and building managers is to ensure that their buildings are as watertight, energy‐efficient, and safe as practical in the present and the foreseeable future. This means investigating and evaluating the building enclosure (roof, walls, windows, waterproofing, structure, and transitions between systems) to define and resolve existing issues as well as correcting deficiencies that can become future issues. Whether an owner is investigating a moisture intrusion problem themselves or have hired a consultant, a specific approach can serve as a guide to determining and addressing building enclosure issues and deficiencies. The quality of a building evaluation has a direct effect upon the ability to develop accurate and complete design documents to repair the issues.
Research a Building’s History Before Determining its Future
Collect Historical Data
Historical data will help determine the original design intent, construction variations, and recurring problem areas in the building. Historical information includes:
- Previous design documents, specifications, and plans
- Codes and standards from time of construction
- Test reports on materials or systems
- Construction documents (i.e. change orders, As-Builts, etc.)
- Local practices or what was normally installed by contractors at that time and in that region
Determine the Original Design Intent and Effectiveness
Considering the original design intent will help determine the cause of building envelope problems. In addition to the intent, the original design effectiveness should be considered. Was this design appropriate for the building’s location? Can it perform as intended? Is the building in a high-exposure area or protected?
Examine Your Building’s Service History
A full understanding of how the building is servicing its occupants is important. Occupant and facilities staff interviews regarding active leaks and draft locations, and maintenance reports are valuable.
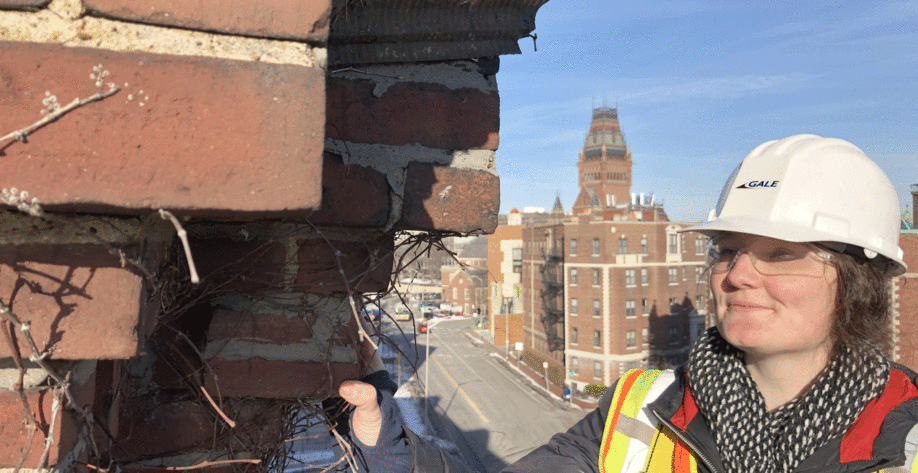
Perform a Field Inspection
The field inspection complements the data obtained from the service history and design documentation, and indicates variations between design and construction and any deterioration than may have occurred thereafter.
Access Methods
There are several access methods available to reach difficult wall/building areas:
- Two-Man Ground Lifts – Can double as an observation and testing platform
- Swing Staging – Suitable for straight vertical drops with a flat building geometry where lift access is not possible
- Industrial Rope Access – Safely access structures by descending and ascending suspended ropes.
Identifying the Defects
Proper defect identification will help determine necessary repairs, aid material selection, and reveal influences contributing to deterioration. It is important to note which factors have caused degradation of the building and its components and how one deficiency and its intended repair may influence or amplify another. Correlating the interior leak audit with exterior defects assists in determining the cause of various problems as it narrows down the exterior testing areas. It also helps owners prioritize repairs.
Testing Methods
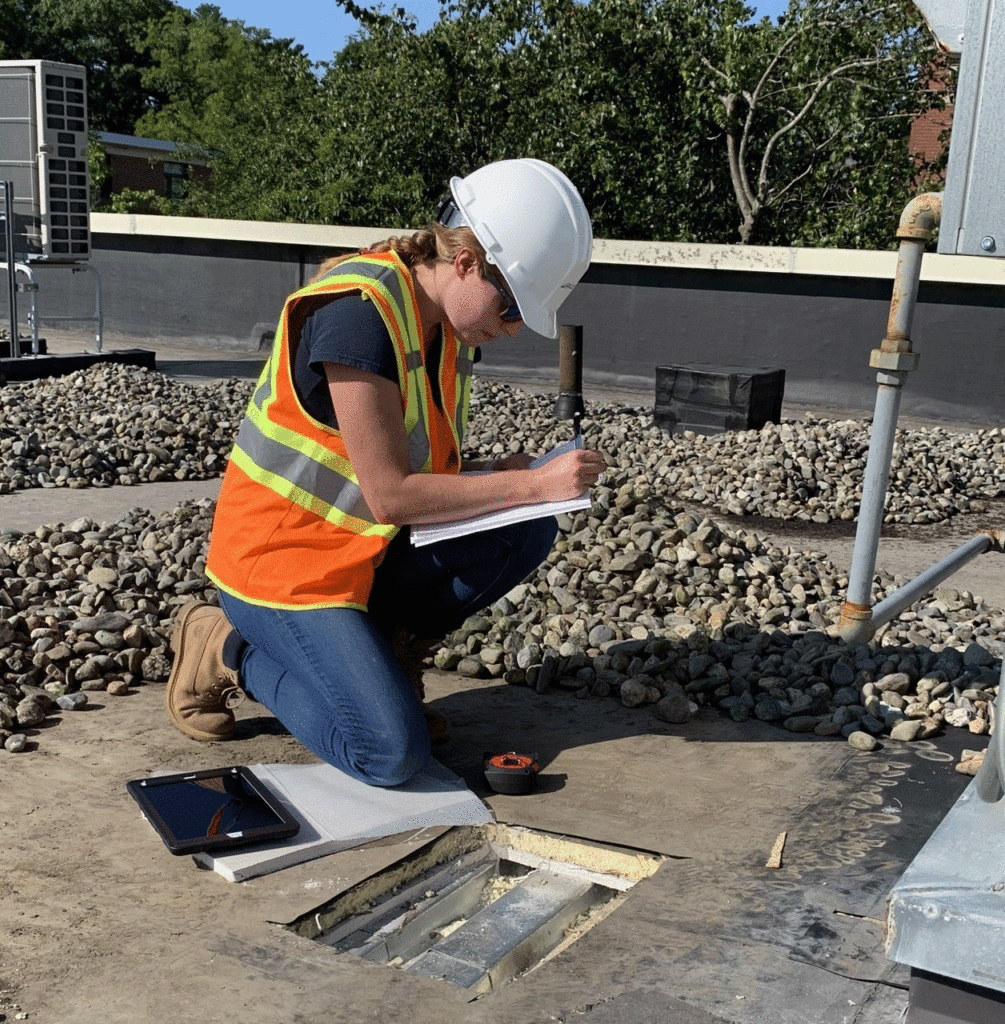
The objective of field testing is to gain additional information about the building configuration and material properties, and to confirm the hypotheses developed while correlating visual defects to reported moisture infiltration.
Non-Destructive Testing
Non-destructive testing uses a variety of non-invasive tools and causes little or no damage to the building envelope.
- Rilem Tube – Adhered to exterior walls to determine the porosity of brick masonry unit construction.
- Infra-Red Thermography – Photographs the building exterior to determine locations of potentially wet components based on material temperatures.
- Soundings (ASTM D4580) – Tap a hammer on surface; a hollow sound may indicate areas where the concrete voids. Another method of sounding is to drag a heavy link chain along a concrete surface to listen for hollow sounds.
- Pachometer Survey – Uses a magnetic device to locate embedded steel reinforcement and helps determine the concrete cover over the reinforcement.
- Polysheet Tapedown – Section of polyethylene is sealed to the concrete with duct tape and removed 24 hours later. If there is moisture beneath the polyethylene, there may be a vapor drive concern.
- Glass-Slide Epoxy or Crackometer – Sealed in place over a crack and periodically checked to determine if any movement has occurred (with movement, the glass will crack or the meter will record).
- Optical Illuminated Boroscope – Inserted into a pilot hole through an exterior wall, allowing cavity walls, stud wall backup of exterior insulated finish systems (EIFS), etc. to be observed.
- Smoke/Dust Tracer – Locates air infiltration.
- Moisture Meter – A digital device that detects the presence of moisture.
- Flashlight and mirror – Placing the mirror behind difficult-to-access areas with the flashlight will allow observation of concealed conditions.
Leak Testing
The most reliable way to test for moisture is to recreate the leakage in a controlled manner to verify the source/sources.
- Water Spray Rack (ASTM E1105) – Simulates a wind-driven rain to verify moisture infiltration.
- Hose Spray Test (AAMA 501.2) – Simulates wind-driven rain in small areas using a standard garden hose in which a calibrated nozzle is attached with a pressure gauge. Differential Pressure Test (ASTM E1105) – A pressure chamber is constructed at an interior location to test moisture driven through a component under negative pressure.
Destructive Testing
When the main objective is to determine the existing composition and configuration of concealed assembly conditions, destructive testing is warranted.
- Roofs – Test cuts in the roof will determine the condition of the insulation and substrate. Allows verification of roofing problems and resulting substrate conditions. Test cuts will also expose the configurations of flashing components, etc.
- Exterior Walls – For masonry walls, it is best to make test cuts at window heads and sills, and other opening locations to expose defective through-wall flashing.
- Gathering Samples for Laboratory Testing – Samples of sealants, coatings, roofing materials, etc. can be sent to a laboratory to determine the presence of contaminants.
- Gathering Samples for Laboratory Testing – Samples of sealants, coatings, roofing materials, etc. can be sent to a laboratory to determine the presence of contaminants.
Laboratory Testing
Laboratory testing will determine existing material types, presence of contaminants, and the possibility of hazardous components.
- Gravimetric Analysis – Determines moisture content.
- Asbestos, Lead and PCBs – Allows owner to consider the remediation costs in the project budget.
- Petrography – Determines the “make-up” of concrete, mortar or other materials.
- Compression/Tension – Determines compressive strength and modulus of rupture for the concrete.
- Presence of Carbonization – Indicates the depth that carbon dioxide has progressed into the concrete. Impacts the potential for embedded steel corrosion and spall repairs.
A Thorough Evaluation = Long-Term Cost Savings
The time and expense to perform an initial, well-focused evaluation will save the building owner/manager money in the long run and result in repairs that extend the service life of an important asset: your building.
Tagged In:
Building Enclosure Design & Consulting